Wednesday, September 14, 2011

Patio Door

You want to know something that feels kind of crazy?  Cutting a big hole in the side of your house. 


Last weekend we tackled the patio door off the dining room.  It feels amazing to open up that space and bring more of the backyard view into the house.  For now we will probably just put some steps in, but eventually that will be a walk-out onto a deck. 

Lee and Charlie worked on Saturday framing up the doorway:


There was a slight problem, though.  The frame they built to go in was level...the floor, not so much.  So, Sunday Lee and I headed over to straighten it out some. 

We took out the jack studs on the right side:


Bumped the header up about an inch:


Then put new jack studs back in...bada bing, bada boom. That part went relatively fast, it was cutting the actual hole in the side of the house that took some time.  We had to cut through the wall you see above, the original wood shakes that were on the side of the house, and the white aluminum siding that is there currently.  I learned all about the kind of blades needed for the circular saw depending on what kind of material you are cutting through.  I wouldn't say I'm quite to "Heidi" level (...Home Improvement, anyone?), but I'm getting there!

Here are some of the finished product:


It needs some patching, but at least it's in!  Now we can get on with the framing inspection...

Wednesday, August 31, 2011

What a week!

Last week is a blur, but in a good way.  We were all excited that the plumbing was roughed in, and literally in the blink of an eye so was the electric and HVAC.  Our electrician was trying to get our house done before two big jobs he has coming up, so he either had to get started ASAP, or wait a while.  Guess which option we chose?  We did have to scramble a bit to make sure we knew where we wanted light fixtures, light switches, outlets, etc (aside from what code regulates), since he literally wanted to start the work two days after we received his estimate.  It was well worth the scramble though since he was able to get the job done so quickly.

In the meantime Lee called Air Kings, our chosen HVAC contractors, to check back in with them about the quote they provided us with a while back.  Without speaking to them in months they said "we will be out there Wednesday."  Fantastic!  So basically within 2.5 weeks we went from having nothing roughed-in to having plumbing, electric and HVAC all in.  We were kind of just staring at each other with dumbfounded looks on our face all week like..."wow, okay, time to figure out who will be doing the drywall".  I don't think either of us expected to be at the drywall stage this quickly, but we won't complain a bit.  After that is done, it's back on us to finish everything.  Here's what's left on our to-do list. 

1. Install the patio doors off of the dining room (which we will be doing this weekend).
2. Insulate
3. Drywall.
4. Tile the bathrooms.
5. Lay/stain/finish the hardwood floor.
6. Put up trim.
7. Ride up to Ikea to pick out our kitchen cabinets.
8. Buy appliances.
9. Move in.

I'm sure I'm missing a few things here and there, but that's pretty much the gist of it.  Our bedroom closets will be built-ins, half of our dining room will be built-in's (two cabinets with a bench in the middle).  We need to replace a couple windows, we will need to paint, etc. But overall we feel like the end is somewhat in sight.  We keep saying "Christmas" when people ask us when we might be in, only becaue it seems far enough away to be realistic...but who knows.  Either way we are pleased with the progress and are excited for these final stages.

Here are a few pictures of things that have been going in.  I don't expect these pictures to excite anyone, but they sure make me smile!  Here's what else is going on behind our walls...

Looking up at the ceiling (electrical wires, air ducts, plumbing drains):

 Not sure why this picture turned out sideways, but those are some of our canned lights in the kitchen:

 Heating/cooling duct work:

 Wire hanging out everywhere, mid-job:

 This is what our wall outlets look like these days:

And our light switches:

Once the drywall is put on the electrician will come out to finish all of the outlets and light switches and hang all of our fixtures! 


Wednesday, August 10, 2011

Plumbing...what's really going on behind your walls.


Something that I really enjoy about this whole process is knowing what's going on under my house, and behind the walls.  Normally I would never think twice about that stuff.  Do we have water? Great.  Do we have lights?  Awesome.  Never mind what's actually making those things possible.  But now, nooooow, I love knowing. 

The plumbers started working last Thursday, did a little on Friday, a lot on Monday, and then finished up today.  I guess the inspector stopped by at some point this morning, and all was approved.  In case you are dying to know what roughed-in plumbing looks like, here you go:

 Blue = cold water pipes       Red = hot water pipes

 If you follow these pipes up to the attic, you find the water heater!  Can you see it?  It's kind of dark...

 The best thing about that is, you will not find it actually sitting in one of our bathrooms like it was when we bought the house: 
 In fact, that bathroom is looking much different these days:
 You can see where the doorway used to be, right?  We decided to wall over that doorway and move the new doorway around the corner (to the left). We weren't really digging the idea of being able to see the toilet from the living room, kitchen and dining room if the bathroom door is left open. So, in switching the doorway over to the side, you won't be able to see inside the bathroom at all...which is much better!

Here we have the tub, again you will see the hot and cold water lines, and if you look really close you might even see the copper line running up to where the shower head will be...

Hookups for sink and toilet...

Hookups for washer and dryer:

Drains for bathroom #2:

 Water pipes and drain for the stand-up shower in bathroom #2:

And finally, my favorite part of it all...the water spicket on the front of the house: 

We will be celebrating this weekend by washing our cars, since hooking up a hose is just about the only way we can actually use this water until it's time to put all of the fixtures in!

We will be appliance shopping in about two weeks, which will be quickly followed by all of the electric going in!!  That will be Edition #2 of "What's Going On Behind Your Walls"!  :)


Monday, July 11, 2011

Framing Week

Well, its been a little over a month since I have updated the blog.  I have good reasons.  Really, I do.  It's not that I've been too busy, or that I've been slacking...we just hadn't done any work!  We had such a productive long weekend over Memorial Day that we decided to use June to "get our ducks in a row" and then crank out all of the framing for the house in one big swoop.  That big swoop was this past week.  We both took the week off work to get 7 solid days in at the house.  Literally, all day, every day was spent at the house.  We did not watch any TV, we did not really see anyone (unless they stopped by to see the progress), we were like little house robots framing away with the little time we had to get things done. And guess what...we did it!!!  All of the framing is done!  It's time to get the plumber out there to do the "rough in"!!! 

Speaking of that ("rough in")...I got to thinking about all of the things I learned this week.  I think maybe I should make a Top 10 list of things I learned last week...

10.  "Rough In" - I get it now.  Everything has to be roughed-in.  Doors, plumbing, bathtubs, attic ladders, etc.  So, say you have a 30" door...when you frame it you don't make the door frame 30" wide, you "rough it in" at 32 inches. You get the point, it's different for everything.  Here I thought you just picked a tub and called it a day, no, you have to look up the "rough-in spec sheet" and get the rough-in dimensions, then frame out that space with those dimensions.  Fancy.  I never knew.  Kinda makes sense, but I also thought it made sense to frame a 30" door to 30".  Good thing Lee knows what's up. 

9.  Speaking of doors, I learned about King and Jack Studs.  King studs go from floor to ceiling, jack studs from the floor to the top of the door.  Then, you set the top of the door frame horizontally on top of the jack studs.  I am now the queen of the king and jack studs - ha!  Sorry, I couldn't resist.  That was bad.

8.  I learned that there are turtles in our backyard from time to time.  I also learned where some of the poison ivy and poison oak is in my yard (thank you Angie Curtis!!).  Now maybe I can dodge that next time around during my yard work!

7.  I learned that when you are working in a non-air conditioned house during the dog-days of summer, 2pm - 6pm is a dreadful, hot, sweaty span of day.

6.  I learned that power tools are pretty freakin' sweet.  Sawzall's still kind of freak me out, but circular saws and air nailers are life savers.  That, and they make me feel like a badass. 

5.  I learned that we will be getting new neighbors soon, the renters of one of the houses in front of us moved out - I'm excited to see who might move in!

 4.  I learned that people look at your vehicle somewhat concerned when they see 17, 14-foot-long, 2x6's in your truck bed...
 (Thank the lord for ratchet straps)
3.  I learned about supporting walls and the types of headers you need to put in for openings that are on supporting walls.  The bigger the header, the more support (kind of a no-brainer, but it helps to see it in action).

2.  I learned to not take for granted (on a normal week) being at work, in the air-conditioning, with a bathroom readily available at any point throughout the day.

1.  I learned (or was reminded of) how unbelievably amazing Lee is.  You have to understand, I was a helper this week.  Sure, I was there when he was there. Yes, we put in the same hours.  But he had to come up with how to do all this stuff, and let's face it, he has the muscle!  As much as I did work, it was nothing compared to the stuff he was doing.  I know it was a mentally draining week for him, and a lot of it he spent in the attic (hot...suffocatingly hot), and yet he remained so calm, collected and patient.  All the while teaching me things, and taking time to explain what certain things meant, and how they worked, and why we were doing it the way we were doing it.  Just amazing!  I can't wait until we are in it, living there, with our feet kicked up, thinking back on all of these memories we are forming.  That will be too cool.

Okay, enough of that.  This post wouldn't be complete without pictures, so here we go....

...Wait.  Real quick, here's a quick description of what we did since it's hard to take pictures of the framing...

We built a door and wall running down the side of the kitchen.  When you walk through the doorway off the kitchen, immediately to your right is a small laundry closet for a stack-able washer/dryer.  If you keep walking straight, on the right you will find the spare bedroom door and on the left is our bedroom door.  From both bedrooms, there are symmetrical pocket door frames leading into a (shared) bathroom.

After we did all of that framing we doubled up the attic joists over the front part of the house so we can put a floor/room up there. That's where the furnace, hot water heater and extra storage will go. We also installed an attic access door/pull down ladder. Then, we finished out the week framing up the main bathroom with a ceiling and roughing in for the bathtub. That's all.  That's the run-down to help you get a visual in your head if you want it.


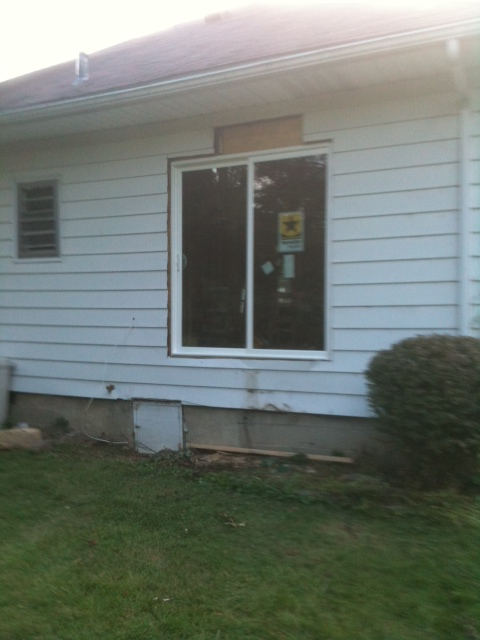
Before we started this week:  

 After:
 

Above is basically looking at what I described earlier.  Laundry room, small hallway, entry doors into both rooms and the shared bathroom. 

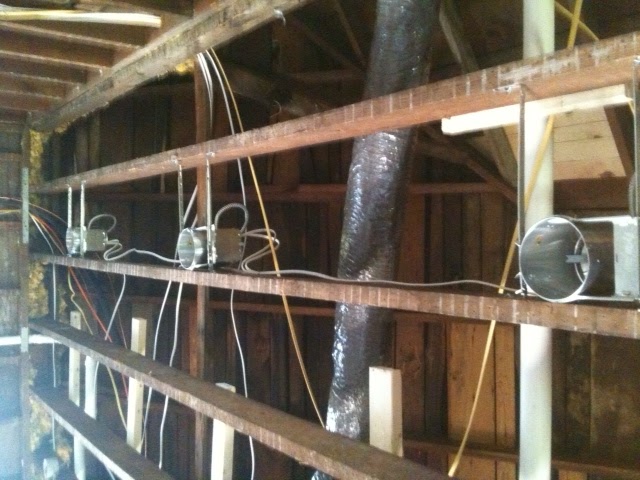
We then switched gears on Thursday and started supporting all of the attic joists.  Below you will see how we doubled up all of the attic joists to provide more support for the weight that will be in the attic...the old joists are dark brown and the new joists are the light color.  Snoozefest, I know, pretty boring progress picture. 
But you know what's not boring?  The attic access door!  Lee appreciates that addition, it sure makes it a lot easier for him to get up there and work.  Here are a few shots of that going in:


Never mind the wood shims, those were later knocked off :) 

 Here are a few cool pictures that show the progress if you were looking at all of this from inside our bedroom:

The "before" shot:

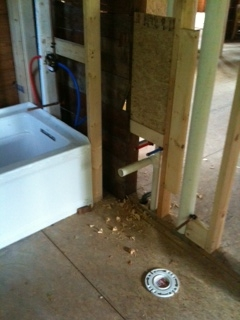
Roughing in the pocket door for the bathroom (this was a 49" opening on a supporting wall, we were glad when this was complete):

Whew, that part is done....notice the nice thick header over the door frame:

We then added the actual entrance door to our room (small door to the right):

 And here's the final "cleaned up" shot once it was all complete:
 

And did I mention it's now time for the plumber?!!?!  Holler!!


Wednesday, June 1, 2011

Long Weekend

We had a heck of a holiday weekend, in the best kind of way!  We both took off Friday to extend the long weekend even more and get 4 good working days in at the house. (I somehow got out of working on Friday, though.)

Day 1: Friday

Charlie came over again to help Lee with the header (translation: the long thick thingy that goes up against the top of your wall so you can remove the wall under it for an open floor plan).

 This is the actual header:

 Bracing to support the wall as they were putting the header in:

 There she is!!  A nice wide opening between the living room/dining room & the kitchen:

The end result:

While Lee and Charlie were busy doing that, I took advantage of my free day and decided I was in the mood for some frozen yogurt - and I knew just who to call...


Day 2: Saturday

Day 2 was full of odds and ends.  Lee braced up the floor of the 2nd bathroom a bit, I spent a lot of the day cleaning up bits and pieces of junk that were scattered everywhere (especially under the house) since we were getting ready to cover it up once and for all.  Then we were able to get started a bit on the rest of the subfloor.

Day 3: Sunday

Sunday and Monday were the true definitions of "sweat equity".  We spend Sunday laying the remainder of the subfloor.

When we started it looked like this:

And when we finished it looked like this:

Uh. May. Zing. It feels so good to have a solid floor beneath our feet, it's almost starting to resemble a house again!

Day 4: Monday

Margie (Lee's mom) has been wanting to help for a while, and Monday was the perfect day for her to help out.  I didn't get any good progress pictures that day because we were too busy working, but the house was full of nails.  Nails lining the wall studs, attic joists, floor joists - nails EVERYWHERE.  Not to mention in the master bedroom there used to be carpet, which means there were rows of staples and nails around the perimeter of the room and going across the middle of the floor. 

Margie and I worked most of the morning on popping up all the staples and pulling them one by one with pliers.  While we were doing that, Charlie was working on pulling nails in the kitchen/spare room and Lee decided it was finally time to take down the ceiling fans and lights that were hanging from the attic joists. 


Then that afternoon it was a team effort of pulling the rest of the nails throughout the house - big job, dirty work, hot conditions. But, it's done!  Done. Clean. Smooth. Ready to go.  We felt such accomplishment after this long weekend and are thrilled with where we are at in this whole process.  I don't have any before and after pictures for this small stuff, but I do have a couple photos of our special helpers for the day:


So, in summary... over the 4 days Lee put in 36 hours and over 3 days I put in 26 hours.  Whew.  Great weekend, though!


Monday, May 9, 2011

Dumpster #5 and A Few Dead Bushes

We had our fifth and final dumpster delivered last Friday night.  Every time we pulled up to the house we had to look at our driveway piled up with assorted junk...a pile of wood Lee accumulated in finishing up all of the structural repairs, a truck bed full of galvanized metal from the old wood burning stove, and way too many soggy bags full of yard waste.  We eventually got sick of looking at it and decided that since we finally had a break from all of the rain we should hurry up and get this out of the way.


In the process of cleaning all of this stuff up, we rediscovered my little bench that I built last fall.  I figured since we were taking down two fireplaces we should at least use the bricks to create some easy seating out front until this whole process is over with!

^ I guess I have some more leaves to bag ^

After loading the dumpster we decided to try and pull up 3 dead bushes along our side yard with Lee's Jeep.  Sure enough, it worked like a charm!  Using a toe strap:


Lee wrapped it around the base of the bush(s), attached it to the hitch on his Jeep...

...and pulled 'em on out!