Tuesday, December 20, 2011

Goodbye tile, hello kitchen cabinets...and a pretty floor.

For some reason...


That I can't quite figure out...


I keep getting sidetracked during this whole floor-laying process...


Flooring is quickly becoming my favorite project to date ;)

(I get way too big of a kick out of taking pictures of him when he has no idea that I am doing it)

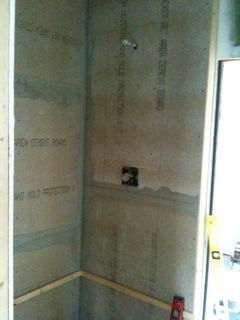
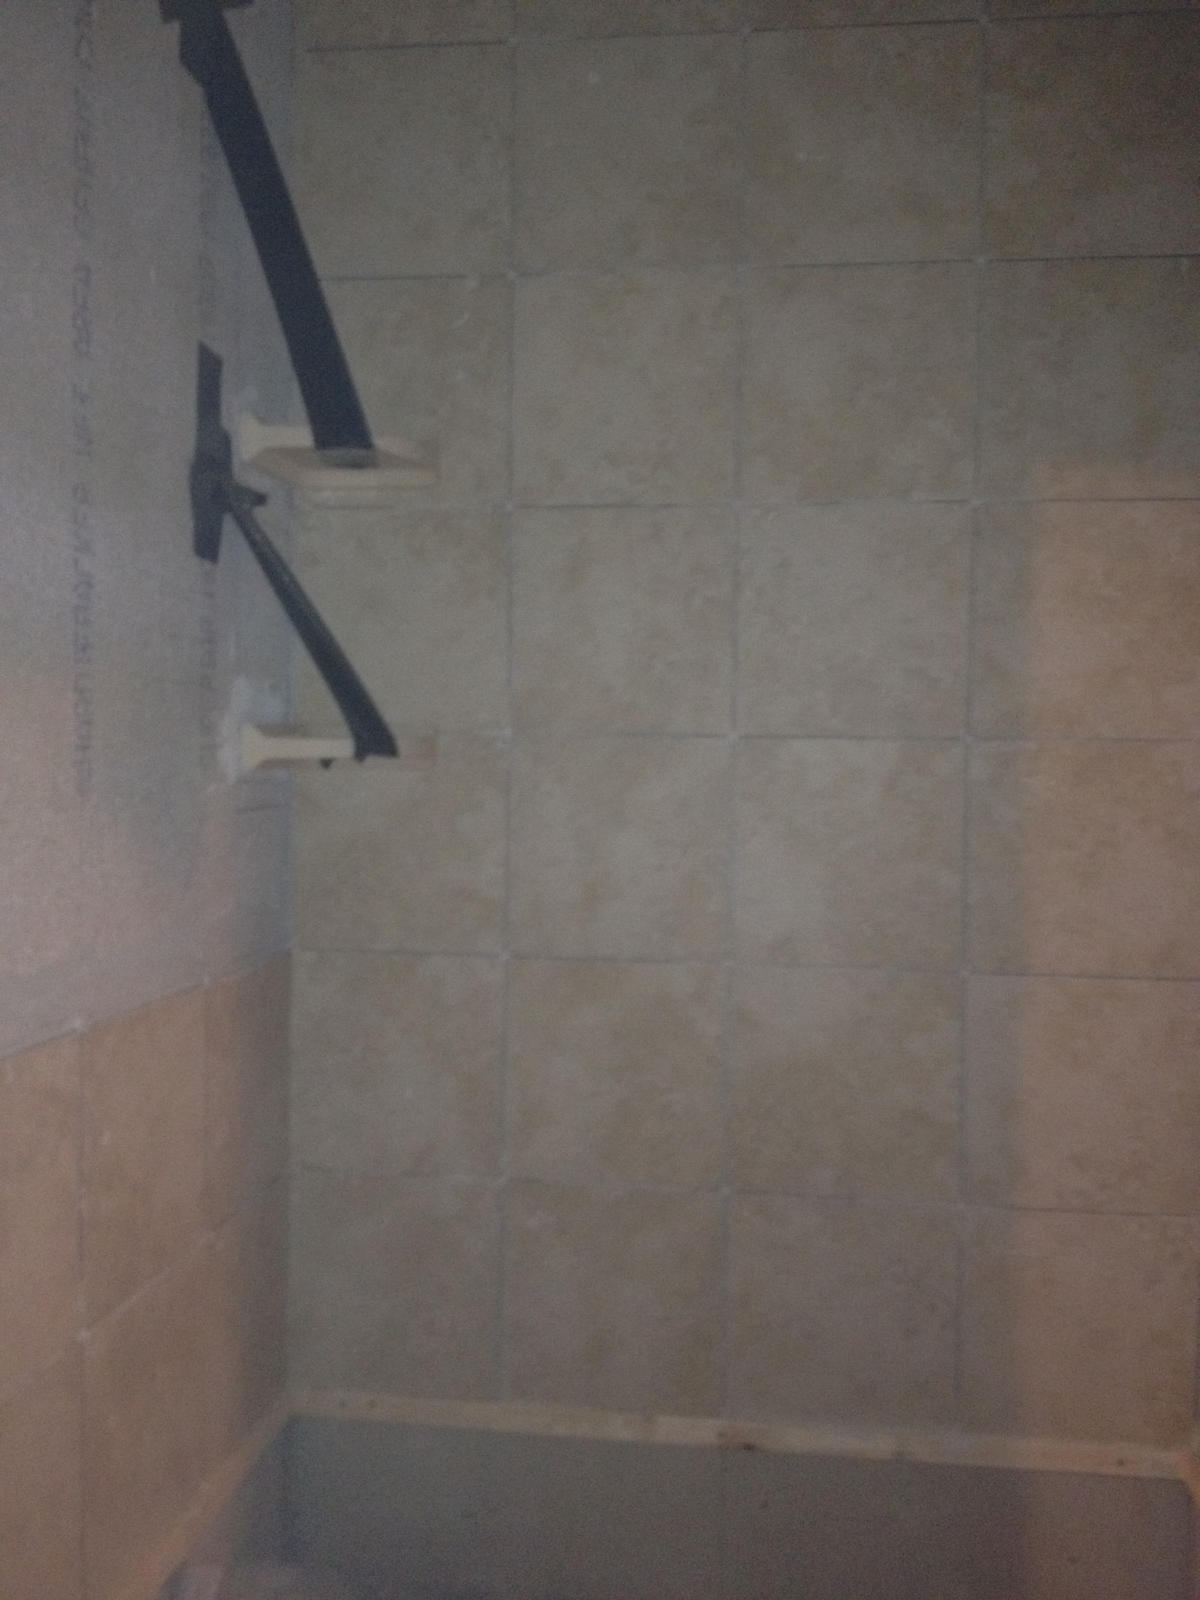
We really are making some good progress, and I was able to squeeze in a few shots of that stuff as well!  A lot has happened since my last post.  We have finished the tile (grout and all) in both bathrooms.  It's hard to get a good shot with the small angles of the bathroom, but here are a couple pictures...

Before Grout in Bathroom 1:


After Grout in Bathroom 1:

(We still need to caulk around the tub, etc, but it's looking much more put-together these days with the addition of the grout)

Before Grout in Bathroom 2:


After Grout in Bathroom 2:


All the final fixtures have been picked out and ordered, so now we just need to schedule our plumbing "finish". That is when they will come to put in all of our sinks, faucets, toilets, etc.  They will also hook up our kitchen sink, and washer/dryer.  I guess that means a washer/dryer will be next our our "things to buy" list.

After we finshed up the tile, my mind was on kitchen cabinets.  We both took off the week between Christmas and New Years in hopes that it would be the perfect week to assemble and hang all of our cabinets.  So, in order to do that we needed to get on the cabinet situation.  That's where Ikea came in.  We headed up there around noon last Thursday, and we left around 9:30pm with this...


And that's it.  That is our kitchen!  Can't wait to show you the "after" shot on that one!!

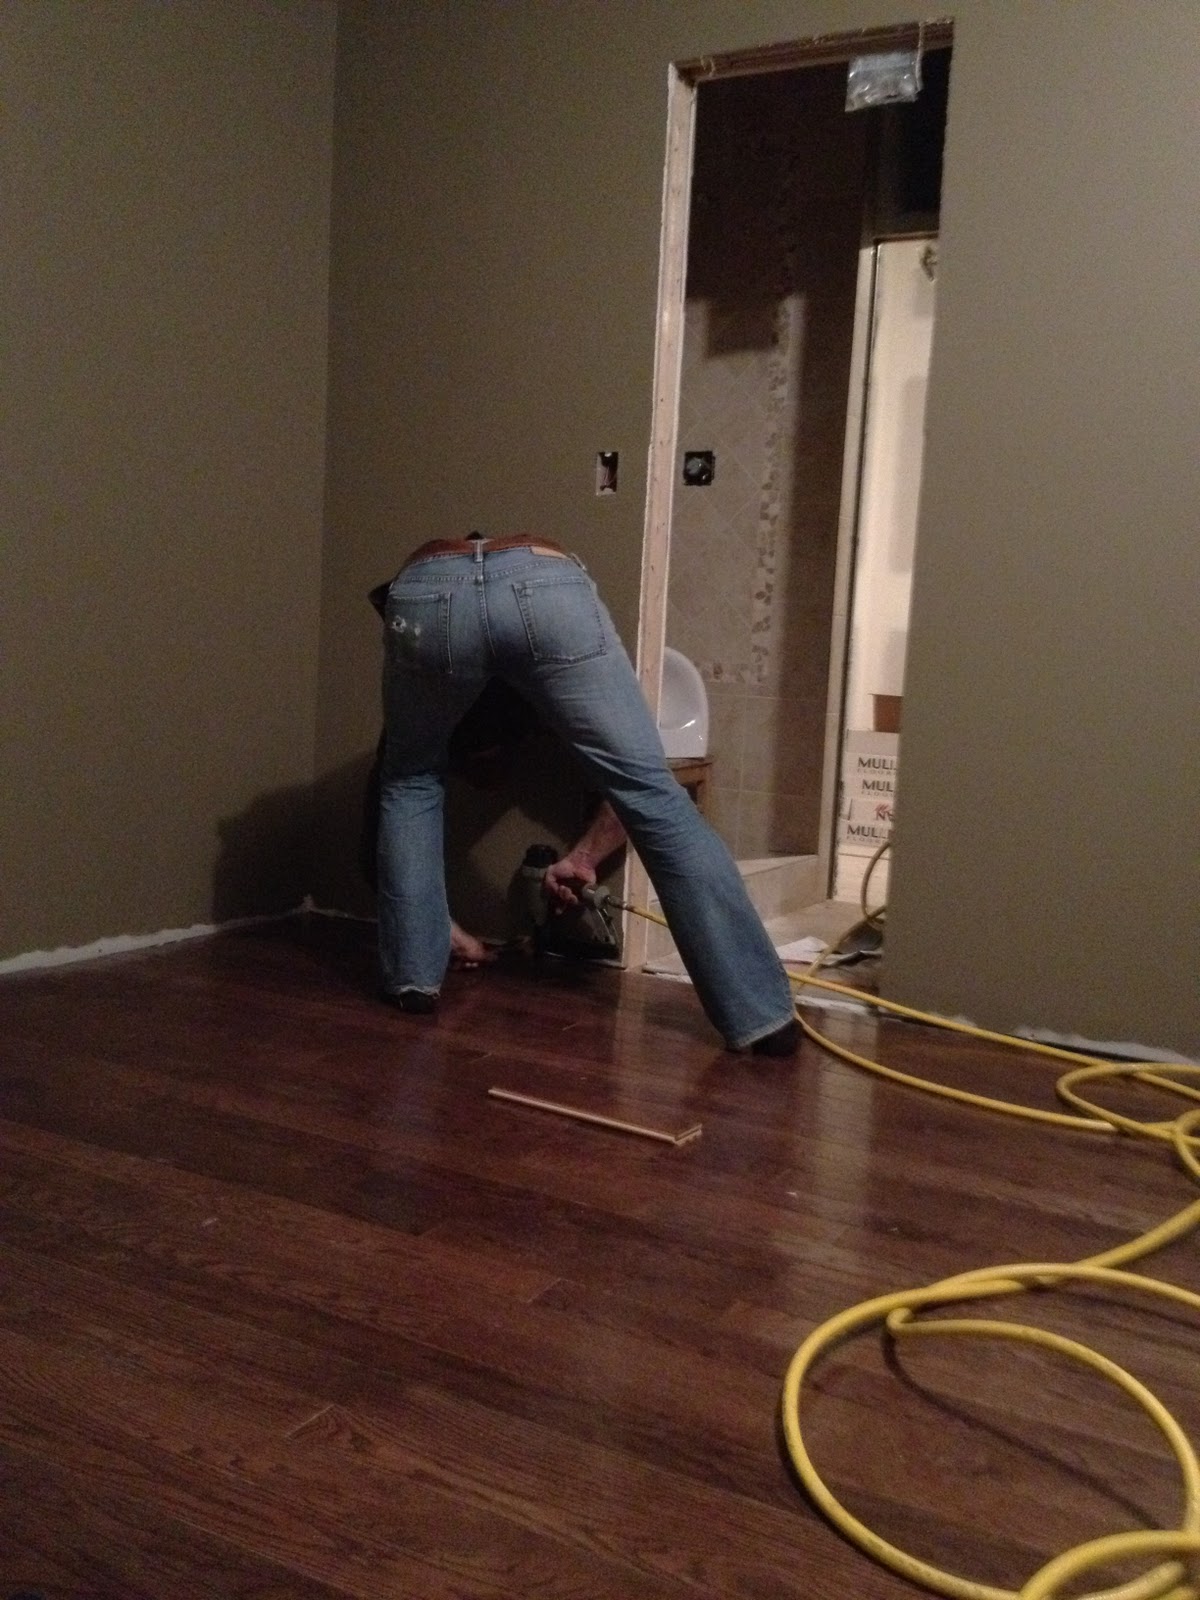
On top of all that, here are a couple floor shots.  We started laying it in our bedroom incase we ran into any snags/learning curves. 

First we had to fill in the holes that were in our bedroom floor (from the closets that were there when we bought it):


Then we had to lay down the black stuff. I forget what this is for.  It's some kind of barrier for something.


Then we started laying the floor down:


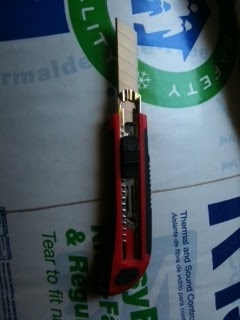
With this handy-dandy nailing device (you just bop the little black knob thing with the hammer thing and it produces a staple that is virtually impossible to remove...which we learned first hand):


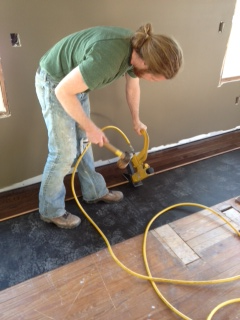
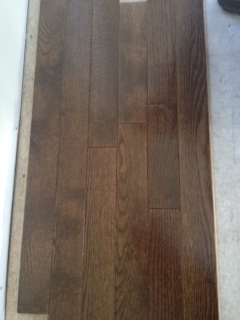
And here's a better shot of most of the bedroom floor:


And just like that, the bedroom floor is done. Hopefully the rest of the house will be laid by Christmas!

Speaking of Christmas...I hope you have a very merry one.  We totally slacked on Christmas cards this year, but we wish you a very, very happy holiday season and a healthy and happy New Year.


Thursday, December 1, 2011

Flooring, More Tile, A Christmas Tree & Chalkboard Wall Fun


This morning before work, Lowes came and delivered our hardwood flooring.  39 boxes to be exact.

 Here's a little teaser of what it looks like...


We are pretty much in love with it.  We went to visit it at lunch just to remind ourselves of just how much we love it.  I just sit and stare at it for way longer than I probably should.  And then I picture everything that will go along with it, and end up staring at it some more before Lee finally snaps me out of my daydream and we go on about our day. 

On top of flooring, we have made some tile progress in the main bathroom. 

Floor: 


Bath Surround:


Lee even decided to get action shots of me this time around:


We still have to do the wall behind the toilet and sink, then do the grout (in both bathrooms), and theeeeen we can lay that beautiful floor I just showed you above!

And on top of all that, we decided to get festive.  Check out our tree...lol.


And if you couldn't tell, we I have been having so much fun with the chalkboard wall already.  Lee's family was in from MI over the holiday weekend so I put it to good use:

Notice my two little gingerbread men at the bottom...Adam and Evan stopped by to play :)

Monday, November 14, 2011

Tile Progress!

After much preparation and anticipation, the tiling has finally begun!  Here are a couple “before and afters" from our efforts this past weekend.

Shower Before:


 After:


 Custom shower pan Before:

After:  (take note of the little seat Lee built - I'm going to have to focus a little more on portion control)  :)

And here are a couple of the corner shelves we put in. We had to tape them to the wall so they could set up:
I'll post some more pictures when it's complete! 

I love that from this point forward it’s all stuff that will actually add to the décor of the house…tile, hardwood floors, lighting, built-ins, etc.  It’s coming to life!


Thursday, November 3, 2011

Not As Planned

Frustration, sore arms, little patience, botched wall, stupid angles, wrong color, bad texture, neck issues.   Those are the first words that come to mind when I think about the last 5 days. 

This makes me think of an older lady that lives in our condo complex.  One day I saw her out in the parking lot and I asked her how she was doing.  She said "Do you ever have those days where you have your whole day planned out and you know exactly what you want to get done, but you quickly realize that God has a whole different plan for your day? ".  That really stuck with me.  I thought that was such a wonderful way of looking at it.  Not all days are going to go how YOU want them to, big woop.  Things happen.  Life goes on :)  

In this case, our weekend did not go as planned.  You all remember my last post, right?  I was all “tiling woohoo!! painting woohoo!!! Life is great, progress is being made, I can’t wait to inhale those paint fumes and see tiles on the wall.”  Ha!  That was until every single thing we set out to do that weekend went wrong.  I was in a pretty great mood until we were riding home from Sunday dinner and it hit me.  I turned to Lee in the car and said “Ya know?  All in all that was a pretty crappy weekend now that I think about it” (well, crappy wasn’t really the word I used, but for blog-sake we will leave it at that).  He kind of chuckled and asked me what I meant.  That’s when I broke it down for him….

1)       It took him 5 hours to hang backer-board in ONE bathroom (all thanks to our weird angles, non-level walls and floors...and the fact that the concrete board stuff is a doozy to cut).


 Finished product:


2)      I painted the living room/dining room and it did not turn out the color that was on the swatch (whyyyyyyy are there so many options if they can't get it to match anyways?!)  However it is still a light neutral so I guess that's a plus, no sense in dwelling on it..


3)      I also started on our chalkboard wall in the kitchen.  I had the fantastic stupid idea of using something called Magnetic Primer on a big long strip across the wall. The point of that primer is that once you paint over it, that section of the wall is magnetic.  I was thinking we could hang Christmas cards, birthday cards, pictures, etc. across our chalkboard wall.  Well, turns out that stuff is a pretty thick texture (meaning once painted over, you could really see this section of primer since the texture is so thick).  While it seemed like a good idea, it just really wasn’t.   Flash forward to last night. Remember the “sore arms” bit I wrote in the first sentence of this post?  That is because I sanded every bit of that magnetic primer off the wall to try and smooth it all back out to where the big strip won’t be visible across the wall anymore.  I painted another coat of chalkboard paint over it, held my breath, crossed my fingers, did some kind of weird hopeful chalkboard dance, and then drove by this morning to check out the results.  Better.  Not perfect, but better.  Here’s to hoping another coat of paint will do the trick. 

Before (this is the magnetic primer):


 After painted over with chalkboard paint. Can you see the line across the middle of the wall below?  It was even worse in person.

 Here's the line again:

 Sanding, sanding, and more sanding:

 Here it is with another coat of paint over all of the sanding. Better!! ALMOST unrecognizable.

 I still have a couple more things to do to work my magic, though.  Wish me luck!!

So in better news, the chalkboard wall seems to be on the mend, Lee finished our custom shower pan last night in our 2nd bathroom (!), and I will continue painting the rest of the house this weekend.   I don’t usually dwell on negative stuff, it was just funny to me that so much frustration went down in one weekend.  I think when we only have 2 solid days per week (at best) to work on projects, we just really hope for the best in getting things done in that short of a time frame. It's bound to happen that things go wrong or slower than we expect, we might as well laugh about it when things don't go as planned.

Here are some progress pictures of Lee’s custom shower pan.  This was quite the process, two layers of concrete, a moisture barrier between them, some kind of wire lathe, setting the slope correctly so that the water drains, etc.  I think Lee's pretty happy to have this behind him:


Now it's all set to be tiled, except we have to hang the backer board stuff in this shower too...I really hope it goes smoother than the main bath.  This bathroom is a lot more square, so let's hope. 

I can't wait to see how far we get this weekend! 

Thursday, October 27, 2011

Paint...Tomorrow!!

Tomorrow, I start painting while Lee starts tiling the bathroom.  I just used the words "painting" and "tiling" you guys.  We are so close!!! 

That means that Lee can finally stop going like this...


 When I come at him like this...


Wednesday, October 5, 2011

Insulation and Studs

Insulation
Tools Needed:

Your insulation of choice: 

 
A really sharp knife:
 
A really good stapler: 
 

A ladder: 


A really sexy husband: 


Okay, the last one is optional.


It's just an added bonus.


A really, really nice added bonus. 

 
Here are a few before/after pics just for fun...

 
Before:

   After:

 Before:

 After:

Insulated kitchen:

 Insulated ceiling:


Insulation is exciting and all, but I'm sick of looking at studs.

Studs...
 
Studs...
 
Stud...
 

...you get the point.  The good news is I don't have to look at those studs for much longer.  A really big truck delivered all of the drywall to our doorstep (literally...check out that arm that brought it right to our front door) yesterday:  
And they start installing the drywall TODAY!! 

I'm not sure how long it will take them to complete the job, but we will be hustling to paint the ceilings before the 18th...that is when our electrician will be back to hang all of our light fixtures, ceiling fans, etc.  Which means we will be able to light this place up!!   One step closer :)