Monday, March 26, 2012

Kitchen Backsplash!

We decided on marble subway tile as our kitchen back splash and here is the result!  I couldn't resist cutting down some wildflowers from our backyard to get a little color in there :)

 Getting it level:

33 boxes of tile:

All laid out to be inspected:

Because I just could not handle the ones with brown in them, Lee let me know that I'm a little bit of a control freak on some things...can you blame me? 

Yellow spacers still in so the tiles can set up:

A little better! 

All finished up.  Still need to grout and seal it, and put the outlet covers back on.  AND get around to the open shelving for either side of the kitchen window...

But all in all we are smiling from ear to ear!!

Wednesday, March 21, 2012

The trimming continues...

Have I mentioned what an annoying job this trim is?  We are almost done trimming out what we refer to as "the main part of the house".  "The main part of the house" is the living room, dining room, kitchen, mudroom and main bathroom.  We are putting all of our energy towards those rooms at the moment because, well, I'm throwing a party in 3 weeks.  Am I crazy?  Yes. Throwing a party before we even move in.  I've lost it. But it's really fun watching the last loose ends make their way together.  My sister is getting married in May, and it just made sense to have the shower at our place.  Without any furniture in yet, that leaves the living room and dining room as one big open space - perfect for tables and chairs.  So, that really puts a "due date" on all of our small projects.  Here's some of what's been going on...

Bathroom window in progress:

 Bathroom window after:

 Bathroom Door:

 Getting ready for some hardware:

Yay!:

Trim on the main opening went up:

Trim on the kitchen door leading to the hallway:

Trim on the front door (bad lighting):

We put the side panels on all of the cabinets and started putting up the deco strips (this is with the side panels but before the deco strips):

 And this is with the deco strip on the bottom:

Toe kick went in on the island, as well as hardware:

Hardware on the rest of the cabinets, too:

And a full shot as of last weekend:

Mud room floor before:

 In progress (I forgot to take an after shot):

We are still waiting on the plumber, they couldn't end up coming out when they had hoped to.  Hopefully they will call at some point this week *fingers crossed*.  We will be working on the kitchen backsplash and open shelving this coming weekend!  Time to take a break from all of the trim - we need a breather from that project :)


Wednesday, February 29, 2012

Trim and a Washer/Dryer

Well, there's good news and there's great news.  Which do you want first?  Hopefully good, because I'm going to start small and build up from there!  The good news is we are now the proud owners of a stackable washer/dryer.  We were trying to save some $$ on this purchase, so we have been scouring craigslist for a gently used model.  Were you aware of what a hot ticket item stackable washer/dryers are?  I certainly wasn't.  You have to really hone in on your craigslist stalking skills to land one of these bad boys.  For example, one was posted in Louisville at 7:10am on Monday morning, by the time I got to work at 8am and Lee called them someone had already bought it and was on their way to pick it up.  Um?? Really?  That left us driving to Oolitic, Indiana on Monday night after work.  4 hours roundtrip and we finally have the last piece of the puzzle in place. 

So, that leads us to the GREAT, fantastic, super exciting news.  Now that we have the washer/dryer we are ready to schedule the plumber.  Once the plumber comes out we can move in.  Guess when the plumber is coming?   NEXT WEEK.  Holler!!  Who knows when we will actually move in, we still have to finish up the trim and do lots of odd-jobs.  But the point is it will be a functioning house within the next couple of weeks.  Whoa.  Strange feeling!

In other good news, we have been chipping away at the trim.  I laugh at myself because I kept saying "oh the only thing big that we have left to do is the trim".  I would say it like it was nothing, "oh, just trim".  When will I learn?!?!  This trim stuff is a huge job.  Especially since we are doing it out of MDF and not just buying wood trim.  Why would we do that, we obviously don't like taking the easy route on anything.  But the real reason is it's like 100x cheaper to do it this way.  So, what that means is we take a 4'x8' sheet of MDF (it looks like this, but in big sheets):
Then we have to cut it into strips, sand it down really good, prime it, put it up and then paint it.  It's a really long, annoying process, but we are loving the results.  Here are a couple progress pictures on the trim:


More soon!! 

Friday, February 3, 2012

Small Detail, Big Impact

Something has been bothering me ever since the lights went in.  Remember this photo?


Well, here's a closer shot:


Can you tell what was driving me bonkers?  It might just be me, but the way the cords were exposed and kind of wavy was driving me crazy.  It just didn't look "finished".  Now, typically this is what down-rods are used for.  Down-rods are metal and you can slide them over the cord to give it a more finished look (the lights in our bedroom have down-rods, notice that you can't see the cords?): 

 I couldn't do that with the way this light was configured, though.  I would need to wrap something around the cord rather than sliding it onto it (if that makes sense).  After perusing Lowe's for a few minutes, I came across these guys:
I think you get where I am going with this.  I was able to spray paint the rod black and then shove the cord inside of it.  Voila!!


Check out the one on the left compared to the other two. So much better, right?!  I love a quick fix!

Monday, January 30, 2012

Appliances!

Instead of working on trim or perfecting the sink apron this weekend, we did something much more exciting...we bought our kitchen appliances!  It all happened pretty fast, and we are loving what we ended up with.  They even delivered them this morning...thanks HHGregg! 

Here are a few pictures of what we ended up with:


It's the Frigidaire Professional Series...which to be honest makes me feel like I need to go take a cooking class in order to live up to its capabilities ;)

I hear the stove is a true "work-horse" based on many reviews, and I have to admit I've never cooked on a gas range before.  Getting used to stainless pots & pans vs. the non-stick variety was tricky enough for me a few years ago!  Can't wait to dig in and impress Lee with some masterpiece meals!

Friday, January 27, 2012

Apron

Well, I did as I mentioned in my previous post and worked on our apron for underneath the farmhouse sink. 

The first problem I came to was whether or not I should use grey or white thread?  Thinking I should just look at what color thread I have in my kit I reached for it to take a look, but got sidetracked by the sewing machine itself.  As I opened it up, I realized it was not threaded yet (I'm pretty sure I was thinking that if white just so happened to be "hooked up", then that would make my decision very easy).  No luck, it was not threaded.  I glanced over at the manual, coming to the conclusion very quickly that I was not about to crack that baby open and look at the instructions.  Because you know...that would just be way too much effort for a Wednesday night.  Plus, lets be honest, Modern Family was on and that was more important than trying to figure out how to thread a sewing machine.  Not to mention that would just take me back to square one...grey or white?  Again, too much thought for a Wednesday night. That's when I had the best idea ever...no-sew-iron-on-adhesive..."aka"  Heat n' Bond.

Problem solved, I didn't have to choose between grey or white AND I got to watch Modern Family white doing a little easy ironing...talk about a win-win.

The good news is the Heat n' Bond worked like a charm.  The bad news is how I chose to do it was not the best idea.  I was thinking that since it had such a geometrical pattern,  it would not look good all scrunched up like a normal apron would look.  Here are a couple examples of scrunched-up versions:


So, I no-sewed it to be flat...thinking it would look all modern and sleek against that rustic hardwood floor:


Womp...womp.  I'm not sure what you're thinking, but I think it looks stupid.  At which point I decided to scrunch it up just to see what that might look like:


Not too shabby.  And it actually looks even better in person than in the pictures.  I chose this design (and color) because our back-splash will be marble subway tile.  In trying to keep with the grey/white/black/stainless theme I was thinking this would just kind of blend.  The good news is I started liking it. The bad news is since I no-sewed it to be flat, I didn't have enough to scrunch the whole thing and cover the entire section that needs to be covered.  Bummer. I'm also kind of wondering what some thick burlap would look like in that space, so I think I will try that out this weekend.  If all else fails, I can order some more of the fabric above and do it better next time!

Wednesday, January 25, 2012

Lights, fans, action!

I wasn't sure what to expect when we pulled up to our house at lunch yesterday.  There was no car in the driveway, which led me to believe our electrican, Greg, had never come. So when I turned the corner from our back door to our kitchen, I squealed!!!  Everything was in!  And looked SOOO much better in person than it did in my imagination (and it looked great in my imagination).  First I saw the pendant light over the kitchen sink...


Then off in the distance I saw our ceiling fan in the living room:


Followed by our pendant light that will hang above the dining room table:


But my favorite...of everything that was installed...is the light in our grey and white bathroom.  I was going for old-timey glamour for this bathroom, and this really adds to the effect:


And when it's turned on...

Check out that design on our grey ceiling.  LOVE IT.

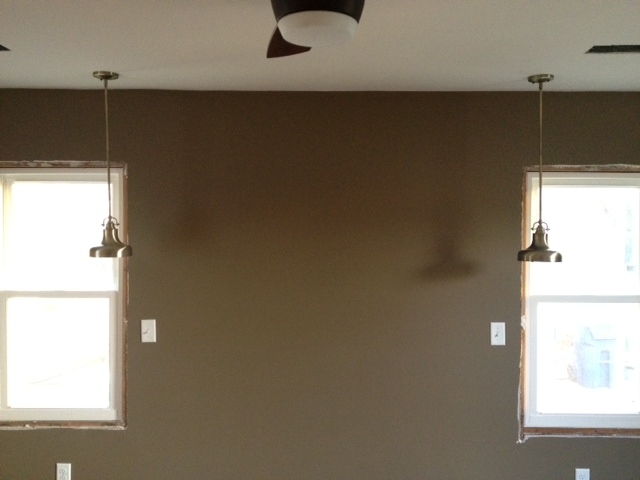
After making my way to our bedroom I fell in love all over again with my idea to have pendant lights come down on either side of our bed rather than doing bedside table lamps:
(And if you look on the wall you can see we both have our own switches, score!)

And here's the ceiling fan in our bedroom:

After all of the lunchtime excitement I just couldn't resist going over again last night to put our cabinet faces on.  I was itching to see what it would look like more "finished"...


In the picture above you can see our hanging pot-rack that was also installed!  Exciting day on Tucker Station!!  I think tonight I will work on our "apron" for under the sink since our fabric came in.  It looks like this...


 One step closer!!